CHECKING THE MATERIALS-Check all the parts and tools against the list that follows. Ensure that the door section is free of damage from shipping or handling.
Find the bottom section of the new door. Support the section on padded sawhorses while you work on it. Find the cable drums and the center bearing plate and start their set screws.
1. Measure the Opening
Take some basic measurements to determine the size of your garage door opening. This will help you decide what type of garage door to purchase and how many tracks you will need. Start by measuring the headroom, or the distance from the top of your garage opening to the ceiling (or lowest obstruction at the ceiling, such as rafters or fluorescents).
Also measure the width of the areas beside the door opening on either side. Make note of any wires or other obstacles that could obstruct the installation process.
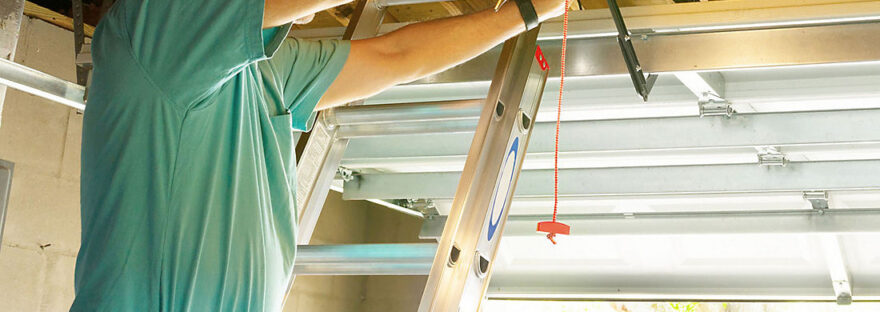
During this step, you’ll need two installers to lift the rail assembly and guide assemblies into place against the jambs. Attempting to do this by yourself may result in serious injury or damage to the door. Therefore, it is recommended that you use locking pliers to secure the bottom of the guides to the brackets for stability during this step.
2. Measure the Tracks
To ensure a proper fit of your new garage door, you need to measure the areas on either side of the opening. You also need to know the headroom required.
Using your tape measure, find the distance between the top of your garage door and the ceiling. Make sure you don’t include the wood jamb in this measurement. Also, check for obstructions like rafters or overhead storage that might interfere with your installation.
This is a crucial step, as it ensures that your garage door will operate smoothly and safely. It also helps you choose the right track size and avoid any potential problems down the road. Proper measurements will also prevent any mismatched components from being installed, which could lead to damage. Luckily, measuring the track radius is fairly simple. Just follow these easy steps to get the job done!
3. Measure the Hinges
Hinges might seem insignificant but they play a big role in keeping your garage door functioning properly. They support the weight of the doors and allow them to move quickly, so they are definitely not something you want to neglect. In fact, if you don’t keep them well-maintained they might break down sooner than expected.
Fortunately, you can avoid this by learning about the different types of hinges and how to measure them. Most garage door hinges have a number printed on them that indicates where they should go on the garage door panels. For instance, #1 hinges usually go in the center while #2 hinges go between the second and third panel. The number also shows the gauge size, which differs from the hinge’s flat base to where it screwed into place. This difference allows you to pick a hinge that matches the thickness of your garage door.
4. Measure the Rollers
The rollers, also called wheels, guide your garage door as it moves up and down the vertical and horizontal tracks. They are available in a wide variety of sizes and materials. Some even have built-in bearings and high life cycles.
For steel roller doors with a continuous curtain that consists of one large steel sheet, the dimensions required are slightly different to those for an aluminium roller door made from individual aluminium slats. This is because the ordering width takes into account the guides which vary in size between manufacturers.
Generally, the easiest way to determine the correct size rollers is to take them out of their hinge sleeve and inspect them. They should sit evenly in the hinge and have no wiggle room, which can create noise or cause your door to get off track.
5. Measure the Tracks
Proper track measurements are essential to the smooth operation and safety of your garage door. Measuring the radius of your tracks is a simple process that can be done with any standard tape measure. This measurement will help determine headroom requirements, which is the amount of space above the door that is required for the extension and torsion springs, motor, and connections.
To measure the headroom, stretch your tape measure from the top of the opening to the ceiling or nearest obstruction above it. Then subtract your garage door height to find the headroom requirement for your chosen track type. Side room is also important, and you’ll want to make note of any areas that might be obstructed by beams or rafters. You’ll need a minimum of 5 inches on each side for mounting the vertical tracks.
6. Measure the Door
To install a door handle, first determine the desired height for the handle. Use a tape measure to find the center point of the desired height and mark it with a pencil on the door. Next, using a bubble level, draw a vertical line on the door in accordance with your pencil mark.
Measure the width of the door frame in three places and write down the largest measurement. Also, measure the depth of the frame excluding brickmould and trim pieces. Finally, use a tape measure to understand the thickness of the existing door and record this information as well. Next, if the springs are not already wound, wind them according to the manufacturer’s instructions. Each turn of the winding bar increases spring tension by engaging one more tooth on the ratchet wheel. Do not exceed the recommended number of turns.
7. Measure the Hardware
Before beginning the door installation, secure a tape measure, a writing utensil and a notepad or other device to record the measurements you take. This will make the process much easier by allowing you to work faster without having to stop and remeasure.
Using the Iron handle set as a guide, mark screw-hole locations on your door panel. Make sure to use a drill bit that doesn’t break through the surface of the door panel.
Loosen the top lag screw on master plate and rotate the door toward the jamb to equalize the gap between the frame and the door. Once the gap is equalized, tighten lag screw. Be sure the locking tab in the guide fully engages with the notch on bracket. If not, the guide and bracket will fall during installation. This can cause serious injury or damage to the door.
8. Measure the Tracks
If you’re doing this on your own, secure a tape measure and a writing utensil or notepad to record your measurements. Also, have an assistant to help you lift and hold the door sections as you go along.
Start with the bottom section and assemble it in the rough opening, pressing the groove of one side against the ridge of the next panel above it. Then shim the end of the panel until it is dead level.
Repeat the process for each of the remaining panels, taking care to note any obstructions that require additional headroom. Be sure to pre-drill holes for the hinges connecting each panel to the track on both sides. Screw the tracks to the wall framing with lag screws. Tighten the screws as you go, but don’t tighten all the way yet.
9. Measure the Hinges
Hinges connect the sections of a garage door together and allow them to move smoothly. However, they can cause problems if they are not the correct size or gauge. In addition, if the hinges are not fastened properly they can become loose or even fall off altogether.
To avoid these problems, you should always take the time to carefully measure and mark your hinges. The best way to do this is by removing the middle hinge and spreading it out on a flat surface. This will give you accurate measurements of the length, leaf width and knuckle size of the hinge. You should also test the hinges to ensure they are properly positioned. This will help you save time and avoid mistakes that can lead to expensive repairs down the road. Using washable marking chalk is recommended, as this makes it easier to remove the marks later.
10. Measure the Rollers
The rollers on a garage door are responsible for supporting the weight of the panels and maintaining their position along the track. When they become worn down, the door snags on them and can cause serious damage over time. It is important to regularly check and replace the rollers as needed.
Most garage doors have standard-sized rollers with a shaft diameter of 7/16″. If you are replacing the rollers, it’s important to make sure the new ones are the same size.
Use a winding bar and slowly crank the springs until the pawl engages with the tooth of the ratchet wheel, then count the number of turns. Do not exceed the manufacturer’s recommended limit of turns or you could risk damaging your garage door. A professional can assist you with this task if necessary. Often, you can find replacement rollers at your local hardware store.